Assignment
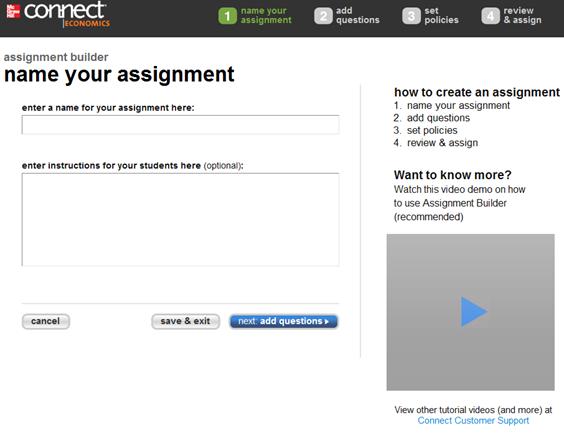
BuilderThe Assignment Builder interface provides access to each of the 4 steps using
the links at the top. They also provide feedback on which step you are currently
on.
 <a onClick="window.open('/olcweb/cgi/pluginpop.cgi?it=jpg::::/sites/dl/free/0000065899/772725/image108.jpg','popWin', 'width=NaN,height=NaN,resizable,scrollbars');" href="#"><img valign="absmiddle" height="16" width="16" border="0" src="/olcweb/styles/shared/linkicons/image.gif"> (26.0K)</a> <a onClick="window.open('/olcweb/cgi/pluginpop.cgi?it=jpg::::/sites/dl/free/0000065899/772725/image108.jpg','popWin', 'width=NaN,height=NaN,resizable,scrollbars');" href="#"><img valign="absmiddle" height="16" width="16" border="0" src="/olcweb/styles/shared/linkicons/image.gif"> (26.0K)</a>
For additional information view the available video tutorial. Step 1 - Name Your AssignmentThe first step to building your assignment is naming it. - Enter the name of your assignment as you want it to appear in the assignment
list. This is the same name students will see when viewing your list of assignments.
- Optionally enter any instructions for your students that will appear when
they take the assignment.
- Click next: add questions to continue to step 2.
Clicking save & exit will save the state of the assignment
in order to leave and come back where you left off. Clicking cancel will return you to the section home page. |